

Still pulling your hair out over Cursed Armor 2's complex branching paths? Got lost in the Imperial Castle on your first playthrough, stuck in Torres City on your second, and still missing key memories on your third? This guide spoon-feeds you every step—follow the order for guaranteed 100% completion.
Remember the core sequence: Empire Route → Torres City Route → Holy Relic Route → Beast Nation Route → Holy Capital Vira Route. Pain points like insufficient Corruption, low level, or untriggered events are all clearly marked here.
Table of Contents
Empire Route Walkthrough
1. First, set your save slots to maximum—save at every step to avoid restarting due to mistakes. Memorize the Imperial map: Plaza District west of the castle, Gate District south, Commercial District east, and Noble District north of Commercial District.
2. Difficulty doesn't matter at start. After the scripted defeat, obtain Identity: Spirit Witch. Transform in the dungeon and defeat the monster to collect Dungeon Memory 1. After becoming First Princess, check the mirror in your room to trigger the scene, then find Jessica in the first room by the stairs after class and return to the castle.
3. Sleeping in the castle repeatedly triggers class scenes—this is the main way to collect Alfred's Memories, Diego's Memories, and Dragon Chant Memories. Talk to maid Jessica and select Move → Castle 1F. Find Ferdinand in the government office on the left, check the book in the top-right corner, return to your 3F room to trigger the scene and collect Bedroom Memory 3. The bathing function collects Bedroom Memory 1.
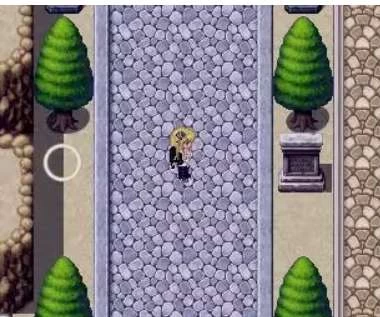
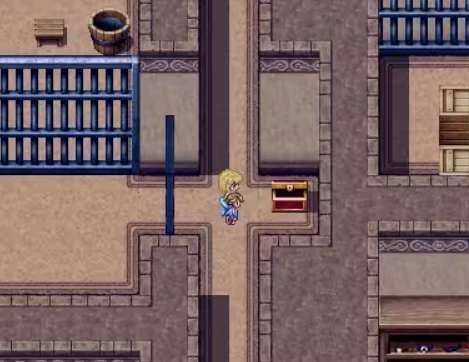
4. After class, find Ferdinand, check the middle-left bookshelf, then talk to trigger the monster subjugation. Transform at night and leave via the balcony. The stone tablet is a regional teleport point—memorize its location (shown below). The middle of Commercial District has a Fortune-Telling Shop that lets you enter the Memory Space. The red building is the Monthly Beauty Salon, where you get the Dimensional Controller for teleporting to the fortune-teller anytime.
5. Climb through the window of the right-side house in Noble District to collect House Memories 1-4. For the monster subjugation, it's recommended to lose at least once in your first playthrough to obtain Identity: Witch Dog and collect Bedroom Memory 2 and Defeat Memory 1. After losing, talk to Ferdinand and return to your room to sleep.
6. Check the top-left bookshelf to unlock Holy Relic Route. At night, go to the Nightclub in the bottom-left of Commercial District to sell alcohol, obtaining Identity: Thousand-Faced Witch and collecting Nightclub Memory 1. Successful sales collect Nightclub Memory 4; failures collect Nightclub Memory 3. Selling alcohol relies on Spirit Power (SP). Ask everyone on 1F and 2F—retry if luck is bad. Restore SP by interacting in Noble District, using Soul Crystals, or using the D skill while in Undead form.
7. Work two days at the nightclub to collect Nightclub Memory 2. Three branches to rescue Jenny: Ferdinand's help, earning money by selling alcohol yourself, or sneaking her out through the window. Defeat monsters for two consecutive days, eavesdrop on Ferdinand's conversation to get Owen's info and collect Owen Memory 1. Find Owen at the lakeside house in Noble District at night to collect Yud Memory 1.
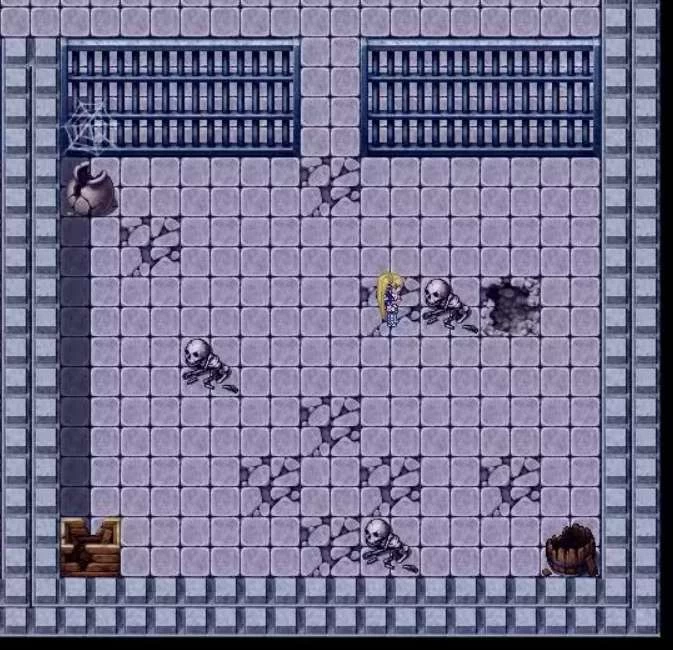
8. Branch options: Return to find Yuuka to collect Yuuka Memory 1, or find the holy relic yourself to collect Southern District Memory 1. Talk to the cabin guard to contact Yud and head to Garon Castle Underground Floor 30. Easy difficulty has battles at floors 5, 10, 15, 20, 25, 30; Normal every 3 floors; Hard every floor. Floor 15 is a boss floor—losing sends you to a jail cell; Floor 30 is the final jail.
9. First playthrough: Recommended to lose and be dominated by King Garon, collecting Undead Memories - Imprisonment 1-4. In subsequent playthroughs, defeating King Garon gives King Garon Memory 1; losing gives Memories 2-3. After being dominated, interact with the undead to advance the story. Choose "Serve the Undead" on the throne to collect Garon Queen Memory 1; interact on floors 1-14 and 16-29 to collect Memory 2. Choose "Serve King Garon" to advance and collect King Garon Memory 4.
10. Get the dungeon key to unlock all of Floor 30. First playthrough: Continue serving the Undead and King Garon to collect King Garon Memory 5, then sit on the throne to become Garon Queen, collecting Memory 3 and obtaining Identity: Garon Queen. This is a minor branch ending—you can give your failure memories to the Daughter of the Wolf God to restart. In later playthroughs, investigate the skeleton directly, return to Floor 15 to serve and advance, collecting King Garon Memory 6 and completing the Undead transformation.
11. Four undead per floor—defeat three, then use Succubus Transformation D skill to charm. Repeat three times to collect Undead Memories - Charm 1-3. Return to the coast and talk to the guard, then go back to the Empire to collect Yuuka Memory 2. Continue monster subjugation for two consecutive days to advance.
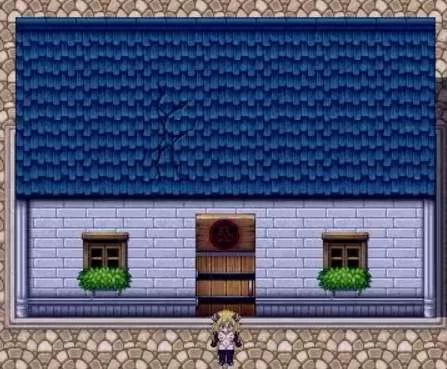
12. Talk to Jenny and select "Travel." The blue-roofed building on the right side of Gate District is the Adventurers' Guild. Find Owen to advance and collect Jenny Memory 1. Find Ferdinand on Castle 1F, travel to the guild to inquire about Black Witch Melissa, then find Melissa at the Black Magic Shop in the top-right of Commercial District at night. Peep on Abaddon to collect Melissa Memory 1-2. Come back every night to get both memories.
13. After peeping, talk to Melissa to rescue the White Witch. Cross the suspension bridge and fall into a hole—enter the Wormhole at the bottom-right, then the rest area at the bottom-left. Read Arianna's Diary. After losing to the Emperor Worm, resting at the Nursery Sanctuary to restore SP may trigger surprise attacks. Intentionally lose three times to form a symbiosis with Emperor Worm Baby, collecting Emperor Worm Memories 1-6. Sleeping while symbiosed collects Memories 5-6.
14. Collect Magic Crystals to feed the Emperor Worm—just fly along walls to find them. After Sophia regains sanity and lands on both feet, fly out through the wormhole exit, return to the temple to read the diary and learn sealing, then re-seal and fly back to the Empire. After ending symbiosis, sleep to trigger the scene and collect Aisha Memory 1. After class, get Historical Records Manuscript from Ferdinand and read it before sleeping to trigger the scene.
15. During the day, go to the Imperial Ruins entrance left of the city, use the teleport stone to go to Emperor Worm Temple. Break the seal to enter the wormhole, collect Worm Eggs and Corrupted Worm Eggs. Rest at the rest area while keeping Undead Transformation active and sleep—the next day, normal eggs become corrupted. Collect 10 corrupted eggs and hatch Undead Emperor Worm at the bottom light circle.
16. While symbiosed with Emperor Worm Baby, walk repeatedly on the red fleshy walls at Nursery Sanctuary, investigate corrupted eggs to trigger the scene and collect Undead Emperor Worm Memory 1. Two failed hatches collect Memories 2-3. Successful hatch collects Memory 5—be sure to find Magic Crystals to restore sanity before sleeping to end symbiosis.
17. Sleep again after success to collect Undead Emperor Worm Memory 6. Trigger the scene to collect Nursery Memories 1, 4. When Emperor Worm Baby rescues you, choose "Leave Alone"—being caught twice collects Nursery Memories 3, 6. Choosing "Leave Symbiozed" escapes safely.
18. After being caught twice, first playthrough is recommended to become Emperor Worm Queen, collecting Nursery Memory 7 and obtaining Identity: Emperor Worm Queen. This is a minor branch ending. Use A/S/D skills in Emperor Worm form to inflict Homing status, then sleep to trigger scenes collecting Emperor Worm Memories 7-9.
19. After escaping, return to the rest area to talk, collect Magic Crystals to heal Emperor Worm Baby, then return to Nursery Sanctuary and choose "Persistent Heart"—if rescued, collect Nursery Memory 5. Alternative hatching method: Walk repeatedly on red fleshy walls, then investigate corrupted eggs to collect Undead Emperor Worm Memory 4 and Nursery Memory 2, but this will miss some later memories—try this on your second playthrough.
20. Use Emperor Worm form—drink from the spring at Nursery Sanctuary to restore sanity, fly out through wormhole exit, re-seal the temple and fly back to Empire. Sleeping triggers dream scenes—class will trigger Torres City and Holy Relic route scenes, which you can ignore. Talk to Jenny about the dream, agreeing triggers the Empire Route Ending, collecting Sophia Memories 1-2. Ending: Arianna's Vessel, obtaining Dimensional Controller.
Empire Side Events
Empire - Prison Event
1. Climbing through windows in Noble District may get you caught, collecting Military Officer Memory 5. Don't confess to collect Memories 6-9 before release. Confess but refuse fines to collect Memories 10-13 before release.
Empire - Jenny's Sneak-Out Follow-up (Corruption > 200)
1. Only triggers if you rescue Jenny through the window without Ferdinand's help. Day 1: Disguised as Jenny, enter the jewelry shop, choose "Think of Another Way → Serve", collecting Disguised Jenny Memory 1 and getting the permit (requires Corruption > 500). Day 2 daytime: Go to Nightclub and choose "Deferred Service", collecting Memory 2.
2. Corruption > 500 lets you work with the permit to pay off debt. Between 200-500, go to guild and choose "Collect Myself at Night", then go to Owen's house in Noble District at night to advance and collect Owen Memory 1. Below 200, Owen can only deliver the contract to the castle.
Empire - Class Event
1. Sleeping in castle auto-advances class scenes. Multi-playthroughs will auto-collect all Alfred Memories, Diego Memories, and Dragon Chant Memories. After Fire Magic Defense class, return to room and choose "Treat Him as Dragon Chant" to later learn the Three Guard Brothers' secret, collecting Military Officer Memory 1.
2. After using Magic Hair Potion, don't return after class the next day. Knock on the 1F room in the barracks to collect Memory 2. Return 10 days later for Memory 3. Within 10 days, pay guards 10,000G for Magic Hair Potion, then interact again after class the next day to collect Memory 4.
Empire - Bathhouse Ghost Event (Wood Affinity > 500)
1. After Jenny becomes your personal maid, learn about the bathhouse incident through nightly chats. Night 1: Enter bathhouse and talk to receptionist to collect Hentai Hero Zero Memory 1. Night 2 collects Memory 2. Night 5 collects Memory 3.
2. When neither Empire nor Holy Relic routes need Ferdinand, talk to him during the day and agree. With Wood Affinity > 500, obtain Identity: Wood God's Servant. After finding someone to plant seeds, wait for prompts. If not triggered, go to Earth Mother Temple to advance and get Mother's Blessing for guaranteed success, then talk to Ferdinand again to retire to his manor.
3. Choose to sleep until night, go to bathhouse as Sophia to talk to receptionist, obtaining Identity: Hentai Hero Infinite, collecting Memories 4-5. Return to Ferdinand's manor, sleep until dawn, then sleep until birth to collect Birth Memory 1. If you took Owen's NTR Branch 2.2, don't go to Ferdinand when prompted after successful planting—instead, go to the northwest corner manor in Noble District during the day, talk to the maid at the door and choose "Yes", then sleep until birth to collect Birth Memory 2.
Empire - Restaurant Boy Event (Corruption > 1000)
After time passes, a boy named Allen appears next to the southernmost restaurant in Commercial District during the day. Day 2 daytime: Talk at restaurant to trigger scene. With Corruption > 1000, visit for several consecutive days to advance and collect Allen Memories 1-4.
Empire - Part-time Job Event (Corruption > 2000)
1. Completing this will force you into Torres City Route—only do this when you need to unlock it. With permit and Corruption > 500, work as a guard during the day disguised as Jenny, collecting CF Memories 2-3 and obtaining Title: Street Performer Girl. More work increases pay rate.
2. The drug dealer next to nightclub at night sells C-drug and Energy Tonic. Energy Tonic auto-uses during work; manually take C-drug before work to collect CF Memories 4-5. Talk to Suspicious Merchant at the inn's 1F restaurant, then work to discover his suspicious drugs, collecting CF Memory 6.
3. Day 2-5 daytime dialogue advances, collecting CF Memories 7-10. Day 5 requires Corruption > 2000 to collect Memories 10-11. Continue finding the merchant to collect CF Memory 12 until you obtain Title: R Slave, collect CF Memory 13, and unlock Torres City Slave Route. If already unlocked, the merchant gets caught.

Torres City Route Walkthrough
1. This route has many battles—recommended for later playthroughs at Level 70+. After learning about Black Witch Melissa and peeping the Demon God's power in Empire Route, go to Imperial Ruins entrance during the day and touch the teleport stone to trigger Torres City Route, then return to your room and sleep to the next day.
2. After the scene, arrive at Torres City. Talk to Yuuka to collect Yuuka Memory 3 and Cloria Memory. Leave the city and return to the western cabin to talk to Yuuka and start classes. Attend class during day and sleep at night to collect Yuuka Memories 4-7. When options appear, choose "Please Take Me With You" to collect Yuuka Memory 8 and obtain Title: RY Hair Ring.
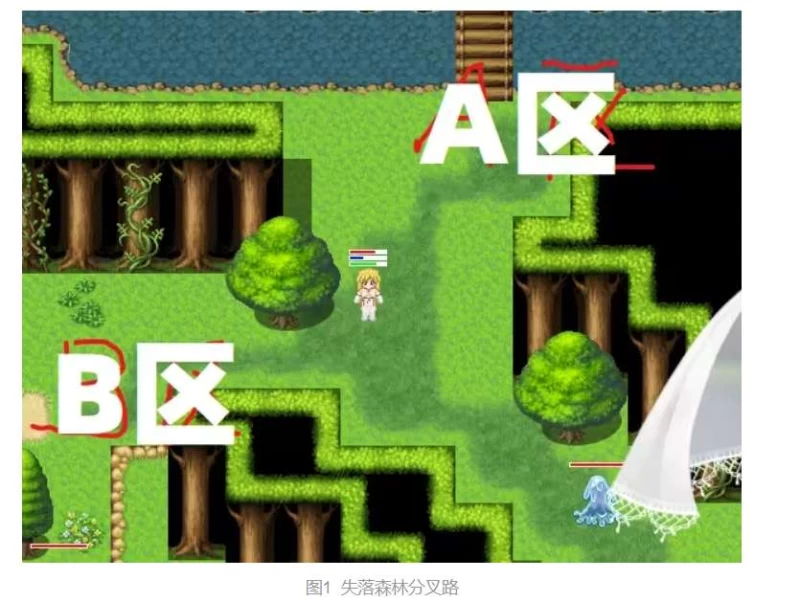
3. Use teleport stone to return to Empire, go to Anvil Port from the harbor. Find bandits deep in Divine Ox Mountain or Lost Forest Area A. Save and repeatedly lose, paying 500G—this may unlock Slave Route and collect Torres City Memory. Or complete Empire part-time job event to unlock, though you may become addicted and need periodic Skooma doses (drains HP and reduces combat power).

4. Learn the map: Northernmost castle has 3 floors, both sides lead to Dungeon. Southern side is the merchant guild, further south is Arena and Venue. Southernmost is City South: top-left is port, right side is Prison and Priest's House, below are warehouses, merchants, and tavern.
Branch 1: Choose Denial (Highly Recommended)
1. Continue auction to collect Crossbow Memory 1, obtaining Identity: Hardworking Princess. Talk to Reske and choose "I am Lilina" to enter Branch 2. Sleep to collect Reske Memory 1, obtaining Identity: Gentleman Hardworker. Work at the Venue in City North during the day, talk to Shulia to get Title: CYDJN. Earn money, return to prison to find Reske and advance, collecting Gentleman Creation Memory 1 and Reske Memory 2.
2. After sleeping, work again. Reske dialogue triggers hair care scene. Go to Arena to find Trosi for updo styling, collecting Trosi Memory 1 and obtaining Identity: Beauty Q. After styling, return to prison for dialogue and sleep, collecting Gentleman Creation Memory 2 and Reske Memory 3.
3. Work on alternate days. Reske dialogue: choose "Guard → Charge Fee" to collect Crossbow Memory 2. Talk to prison reception guard to trigger braided hair scene, go to venue to find Shulia and advance, return to prison to hand over and sleep, collecting Gentleman Creation Memory 3 and Reske Memory 4.
4. Work during day for braids, collecting Shulia Memory 1. Steal 10,000G from Shulia's room, get updo at arena, return to prison and choose "Guard → Free" to randomly collect Crossbow Memory 3 or 4. Collecting 3 gives Title: Silver-Haired Princess.
5. Go to Priest's House to get divination guidance from the fortune-teller. Return to prison without handing over and sleep, collecting Gentleman Creation Memory 4. After waking, work for braids → steal money → arena updo → choose "Guard" to grind Crossbow Memories 3-4, then find fortune-teller for guidance and sleep.
6. After waking, work for braids to collect Shulia Memory 2, arena updo → return to prison to sleep. Work for braids again to collect Shulia Memory 3, arena updo → save before talking to Reske to grind Crossbow Memory 5, obtaining Title: BTGZ. If it doesn't trigger, come back daily until it does, then sleep to collect Gentleman Creation Memory 5.
7. Enter Shulia's room to collect Memory 4. Work → Divination → Arena → talk to Canary to advance. Return to prison and hand over appropriate amounts to ensure you're not last place before sleeping—reload if you rank last. Consistently second place collects Gentleman Creation Memories 6-7. Consistently first place collects Memories 8-9. Consistently last place after divination triggers "Can't Endure" choice, obtaining Title: Campbell Family and collecting Anseil Memory 1.
8. Go to Underground Floor 1 to get Artifact - Addiction Immunity. Then advance through castle merchant guild, go south out of city gates and choose "Want Happiness" to unlock Elf Route, collecting Anseil Memory 3 and Ansemark Memory 1, obtaining Title: KBQ, then give failure memories to Daughter of Wolf God.
9. Choose "Continue Enduring", buy Energy Tonic, save, earn 80,000G. Without transforming, at Level 70+ with no abnormal status, return to prison and choose "Can't Endure" when last place. On the way to merchant guild, meet priest and choose "Almsgiving" to raise Reason above 1000. Leave city and choose "Resist Mental Magic" to start battle—win to collect Anseil Memory 2, then sleep to collect Memory 4. Battle strategy: Lure black holes to elves and use S skill, then spam A—two cycles will finish them. Easy at Level 70+.
10. Reload if you lose, or trigger Night Demon event. After victory, use Elvish to beg outside the gate, sleep to collect Anseil Memory 5. Talk to neighbor Anseil during day, go out begging then talk again to collect Memory 7, sleep to collect Memory 6.
11. After waking, groom hair → train begging → sleep to collect Royal Pet Memory 1. After free action, save and exit to dodge elves into fort. Find Political Officer to collect Memory 1, sleep at night to sync with Anseil and collect Royal Pet Memory 2. Dodge Political Officer during day to collect Memory 2, sync at night to collect Royal Pet Memory 3.
12. During day, dodge elves to give Veronia items, find Political Officer in top-left room to collect Memory 3, obtaining Title: Political Officer's BP. Sync at night to collect Royal Pet Memory 4. After scene, branch: Find Political Officer for Memories 4-8 + Royal Pet Memory 7; OR talk to Veronia and choose "Yes" for Royal Pet Memories 5-6 + Political Officer Memories 5-8.
13. After scene, find Anseil at bottom-right, talk again and choose "Yes" to collect Royal Pet Memories 8-10, obtaining Identity: Silver Elf Mother, then give failure memories to return. Repeat steps 22-24. After ending, choose "Nothing More" to collect Ansemark Memories 2-5, then get artifact underground.

14. Choose teleport to Cecilia. After returning to human form and winning the battle, get equipment and use Star Rune Magic Wand - Mana Extract. At night, investigate Rune's grave at cemetery to collect Political Officer Memory 9. If you can't win, take Branch 2. Night investigation: choose "Fulfill Duty" to collect Memories 10-11. Transform to Undead, control King Garon, find Ghost Sophia to get Artifact - Dream of Release, choose dialogue "Ignore Resistance", choose "Become Garon Queen" on throne to collect Memory 5, obtaining Title: Bewitching Silver Spirit.

15. Get caught by bandits again to return to prison and start Branch 2. Choose "Invent Story" to collect Trosi Memory 2, sleep to continue inventing and collect Cloria Memories 1-2, finally tell truth to collect Memory 3, obtaining Title: JTD.
16. After free action, find Cloria in dungeon at night. Choosing "1" both nights collects Memories 1-2; "2" both nights collects 3-4; "3" both nights collects 5-6 (requires 6 nights total). Randomly talking to castle guards may trigger Crossbow Memory 6.
17. Night: Ask Cloria about pass to collect JTD Memory 1, obtaining Identity: MZ Princess. Night: Go to merchant guild, choose "Willing" at reception to collect JTD Memory 2, continue dialogue and choose "Accept" to collect Special Order Memory 1. Talk to Cloria again to collect JTD Memory 4, obtaining Identity: MG Princess. Choose Special Order at guild to collect JTD Memory 3.
18. Starting next day, visit guild for six consecutive nights: Night 2 collects Special Order Memory 2 and choose "Accept"; Night 3 collects Memory 4 and choose "Accept"; Night 4 collects Memory 5 and choose "Refuse"; Night 5 choose Special Order; Night 6 collects Memory 3 and choose "Refuse". After 31 days, night talk to Cloria to collect JTD Memory 5. After another 31 days, collect Memory 6.
19. Make excuses nightly until you get the pass. Next day, guild discovers too much debt—find City Lord on Castle 3F to guarantee payment, then return to guild to leave city. Back at Empire, sleep, after class don't return to room—go to Barracks 1F to inquire about Magic Hair Potion, check room on Guild's right 2F during day, return to room at night.
20. Night: Go behind the guild at Plaza District, climb in and investigate items on table to collect Long Hair Club Memory 1. Night 2: Continue accepting to collect Memory 2, obtaining Title: FN. Night 3: First choose Small Soul Crystal for info, then choose Support Potion, finally choose Magic Hair Potion and select "Buy Without Money" to collect Memory 4.
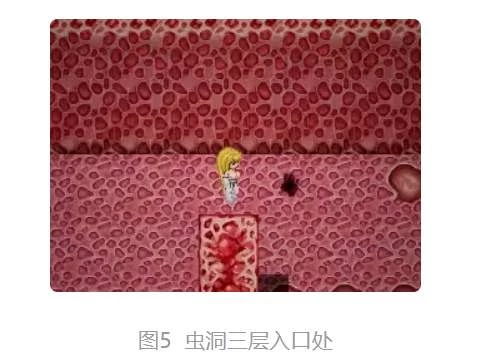
21. After learning about wormhole, go to Anvil City Northeast Wormhole. Enter Floor 2, find Floor 3 entrance to trigger scene, go to nearby passage and choose "Endure" to collect Wormhole Memories 1-3, 5. Investigate rightmost bone pile to feed and collect Memory 6, stake out food entrance to collect Memories 7-8, obtaining Identity: MC Worm Mother.
22. Investigate top passage and choose "Attempt to Devour Nematode". After scaring it off, advance to collect Wormhole Memory 9 and Queen's SJQ Memory 1, obtaining title Queen's SJQ. After merging with Queen, rest during day and night, choose "Talk" to collect Memory 2, next day rest during day and choose "Increase Production" at night to collect Memory 4.
23. Nourish for 3 days to awaken Aisha, choose "Accept" to collect Memory 5. Choose "Solidify" to collect Memory 3, then choose "End" when resting at night, dialogue "Become Worm Mother", enter passage to Floor 2, stake out Floor 3 entrance and choose "Find Aisha", dialogue "Nematode Corpse" to leave wormhole and return to Empire.
24. Night: Go to Long Hair Club to collect Memory 3. Next day buy Magic Hair Potion, ask about worm handlers again to collect Memory 5, go to Commercial District magic shop to advance, return to club to sell nematodes to president, collect Memory 6 after 3 days.
25. Return to wormhole to find Aisha and collect Queen's SJQ Memory 6, choose "Take Worm's Secret Treasure". Bring treasure to Torres City, remove transformation and use pass to enter city and trigger scene. Next two nights, find Cloria and talk about Yuuka to collect Yuuka - Worm's Secret Treasure Memory 1.
26. Talk to Yuuka in cell—persist in persuading her to start battle (easy win at Level 50+). After victory, choose options to collect Memory 4, obtaining Title: YD Ring. Next day daytime find Yuuka to collect Memory 6, night find Cloria and choose "Hair Ring". Next day find Yuuka to trigger scene, go to Castle 1F office to find Yud and collect Yud Memory 1, next day find Yuuka without skipping scene to collect Memory 7, then find Yud to collect Memory 2. Afterwards Yud can help repay debt.
27. Afterwards, work at City North venue during day to get Title: CYDJN. Night: Go to City South priest's house for fortune-teller guidance, go east of City South to give Anna 1,000,000G to obtain Identity: Saint of Destiny. Can ask white-haired guild administrator about earning methods, blue-haired administrator to return next day, or directly take 1,000,000G loan from loan shark for Anna. After borrowing, ensure no Special Order appointments at night, confirm blue-haired administrator during day, get City Lord's guarantee on Castle 3F, then return to guild to process departure.
Torres City - Night Demon Event
Branch 1: Successful Escape
1. Daytime at City South western port below warehouse, lazy sailors spawn randomly. Talk to trigger scene requiring rations, water pouch, and 60,000G to remove collar. Buy rations from merchant above tavern, water pouch from tavern receptionist. Confirm 65,000G, then go to warehouse entrance. If no sailor, wait until next day. If there, investigate entrance and choose "Wait for Opportunity", hide in iron ball box and insist on not leaving.
2. At Anvil Port, buy cloak from beauty salon, ask female shopkeeper at northwest weapon shop for help, then find Yuuka to retrieve equipment.
Branch 2: Failed Escape
1. Prepare at least 160,000G. Not buying rations/water pouch, not entering iron ball box, or leaving midway will all trigger failure and Night Demon event. If caught on ship, choose "Accept" to become Ditis. Talk to captain to collect Sam Memory 1, find Caroline at bottom floor and sleep to advance.
2. Day 1 day: Find all 3 deck sailors and choose "Change Person". Bottom floor bottom-right sailor dialogue collects Ditis Memories 1-2, return to room at night. Night: Warehouse entrance sailor chooses "Change Person", upper floor bottom-left sailor dialogue, upper floor captain dialogue collects Sam Memories 2-3.
3. Day 2 day: Find Second Mate in cargo hold to collect Ditis Memory 4, top-left sailor chooses "Change Person", bottom-right sailor chooses "Change Person", deck 3 sailors dialogue. Night: Cargo hold entrance sailor, upper floor captain dialogue.
4. Day 3 day: Cargo hold 2, deck 3 sailors. Night: Upper floor 1 captain. Day 4 day: Cargo hold → Second Mate chooses "Forceful → Push Down" to collect Ditis Memory 5, cargo hold 2, deck 3 sailors. Night: Bottom floor 1 captain.
5. Day 5 day: Cargo hold 2, deck 3 sailors. Night: Upper floor 1 captain. Day 6 day: Cargo hold 2, deck 3 sailors. Night: Bottom floor 1 captain. Day 7 day: Cargo hold 2, deck 3 sailors. Night: Upper floor 1 captain. Day 8 day: Cargo hold 2, deck 3 sailors. Night: Bottom floor 1 captain. Deck First Mate chooses "Obey" to obtain Identity: Silver Fish, collecting First Mate Memories 1-2. Upper floor divination collects Caroline Memory 3.
6. Day 9 arrives at Torres Port. Daytime: Captain settlement. Following days in port. Next day, save and talk to cargo hold sailor to collect Ditis Memory 3. Getting caught stealing triggers Night Demon transformation and collects Sam Memory 4. If not caught, steal again next day.
7. Day after stealing, find captain and choose "Serve → Endure → Rest". Night: Sleep and choose "Yes" to set sail. After sailing Day 1 day: Second Mate chooses "Forceful → Push Down" to collect Ditis Memory 5, cargo hold 2, deck 3 sailors. Night: Bottom floor 1 captain.
8. After sailing Day 2 day: Deck 3 sailors, bottom floor 1 sailor, Second Mate. Night: Cargo hold sailor, upper floor hallway sleeping → find sailor who wakes Sophia, deck First Mate collects Memories 3-4, captain dialogue bottom floor top-left room.
9. After sailing Day 3 arrives at Vira Port. Captain settlement: win competition and choose "Concentrated Essence", choose "Serve → Endure → Rest". Night: Captain dialogue → enter warehouse → choose "Precious Item" to get Artifact - Night Demon's Kiss. Return to room, swap identity with Caroline without skipping scene to collect Caroline Memory 5. Reload if you can't win.
10. After sailing Day 4 day: Sleep. Night: First Mate. Day 5 night: First Mate. Day 6 arrives at Torres Port daytime: Captain chooses "Leave" to trigger scene, collecting Sam Memory 7. After transforming, sleep in bottom floor room to unlock Caroline memories—random chance on consecutive nights without transforming. Choose "Alright Then" to collect Caroline Memory 6, "Wait More" for Memory 7, "Wait More" again for random chance to collect Memory 8.
11. Transform back to princess, disembark at port, remove collar at Anvil weapon shop, buy back First Mate's shackles. Re-board ship and after sailing, night deck First Mate: return shackles to obtain Title: RBQ. Day: Upper floor First Mate collects Memories 8-10. Night Demon event allows being caught back to Torres City for Branch 2 story.
Holy Relic Route Walkthrough
1. For perfect collection, Level 70+ without transformation and Level 40+ with Charm transformation makes it easy to defeat Divine Ox Mountain Guard, Ice Spirit, and Fire Spirit, and accumulate enough Mystic Fruits for full collection.
2. After peeping Demon God's power in Empire Route, go to Imperial Ruins entrance during day to open teleport stone and trigger Torres City Route, return to room to sleep and advance, then free action allows teleporting back to Empire to advance Holy Relic Route.
3. Return to room, daytime Castle 1F find Ferdinand to advance, decide to go to Anvil City to find Priest Hiller. Daytime: Go to Imperial Port outside city to buy ticket to Anvil Port, talk to priest at church.
4. Next day find priest to advance, go to Lost Forest Area A, go up into deep temple and lose to collect Snake Woman Memory 1. Branch: Choose "Don't Believe" to continue imprisonment—Day 2 collects Memory 2, Day 3 Memory 3, Day 4 Memory 4, after story Memory 5. Branch: Choose "Believe" to escape back to Anvil City and continue Holy Relic Route, which triggers Holy Capital Vira Slime Scene (not recommended now).
5. First playthrough can return to Lost Forest A temple. Reason below 3000 triggers minor branch ending, collecting Snake Woman Memory 6, give failure memories to restart. Obtain Water God Crystal and return to church to advance, go to Lost Forest Area B Divine Tree Sanctuary and lose.
6. Branch A: Insist on not devouring Flower Demon fruits triggers minor branch ending, collecting Flower Demon Memories 5-6, obtaining Identity: Millennium Demon Flower, give failure memories to restart. Branch B: Choose "Maybe I Can But Can't Force It" to forcibly devour Golden Fruit, collecting Memories 3-4, then choose "Try Devouring Fruit" to collect Memory 2—this path can't advance Holy Relic Route. Branch C: Choose "Of Course", then "Try Devouring Flower Demon" to collect Memory 1.
7. Mysterious person gives Botanical Garden. Enter with Flower Demon form to cultivate Mystic Fruits. Method: Interact with right circle repeatedly until "itchy" prompt, then left circle until fruiting, press W skill → Action → Pick. Fruit effect: After losing to Silver Demon King, consume 3 fruits for full HP revive.
8. Fast fruiting: Defeat guard at Divine Ox Mountain to get Earth Essence; defeat Ice Spirit at Ice Temple to get Ice Water Essence. Place at corresponding stone tablets in garden for instant fruiting. After Branch C, exit garden and return to Anvil City. Next holy relic Divine Ox's Broken Horn is at Divine Ox Mountain north of Magic Academy—reach summit for scene.
9. Can defeat guard at Level 45+ to get Earth Essence. Take broken horn back to Anvil City priest, go further north to Ice Temple deepest area, talk to Ice Spirit to get Ice Crystal Flower. Can defeat at Level 50+ to get Ice Water Essence.
10. Same process: Find priest to go to Fire Temple for Blaze Orb, return to Anvil City for final battle. Fire Spirit is immune to fire damage—use Charm Transformation. Victory grants Fire Essence to open Imperial Ruins treasure. If you do Holy Capital Vira Slime quest first, final battle has different scenes.

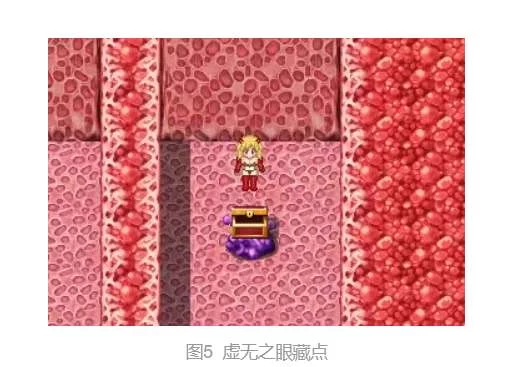
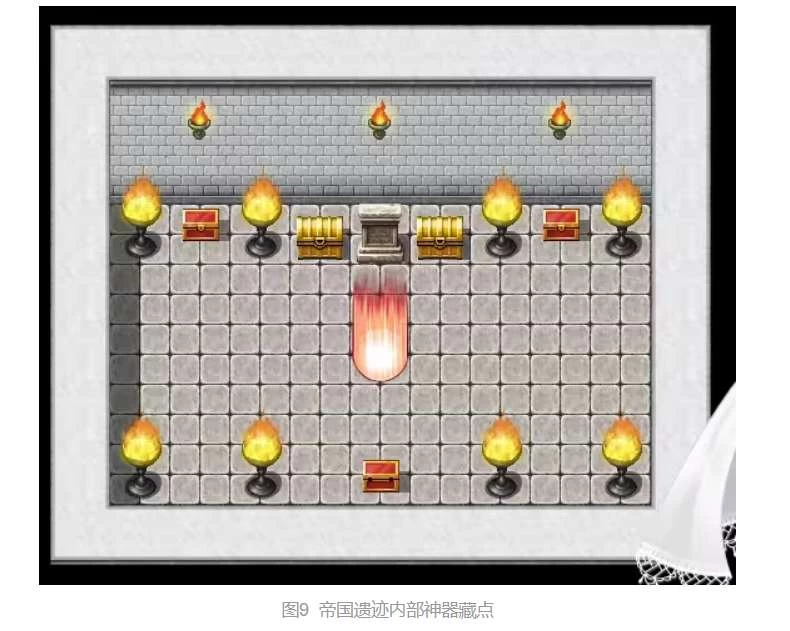
11. After battle starts, go to Imperial Ruins Floor 2 torch location to trigger scene, enter secret room to get Jet-Black Gem. With Fire Essence, investigate stone tablet for treasure. Sealed Land: left Cecilia, middle Silver Demon King, right Berika. Small room between Berika and Silver Demon King contains Artifact - Eye of Nothingness (must-get, reveals hidden artifacts on map).

12. Silver Demon King strategy: Attack left hand → right hand → head (attacking head first heals it). Left hand's water magic is tricky to dodge, right hand is easier. When HP reaches 0, quickly eat Mystic Fruit for full revive.
13. Branch A: Losing and choosing "Give Up" collects Silver Demon King Memory 1 (can give failure memories to restart). Branch B: Win, lose virginity to Berika collects Memory 2 (can restart). Branch C: Win, non-virgin Berika or kill her grants Identity: Silver Demon King Mother, collecting Memories 3-4 (can restart).
14. Branch D: Losing and choosing "Go All Out" grants Identity: Abaddon Queen, collecting Memory 5 (game over, new playthrough). Branch E: Win, virgin Berika, don't kill. As queen, Ferdinand dialogue branch: Option 1 grants Identity: Silver Demon Queen + Title: Ferdinand's Beloved; Option 3 grants Title: Millennium Divination Woman; Option 2 choose Jenny—all collect Empire Queen Memories 1-2.
Holy Relic Route - Flower Selling Event
Triggered by talking to Anvil City girl with essence-tainted fluid in portrait, wait by circle until nightfall to enter house. Participate at least twice to collect Rose Memories 1-4, obtaining Title: Azalea.

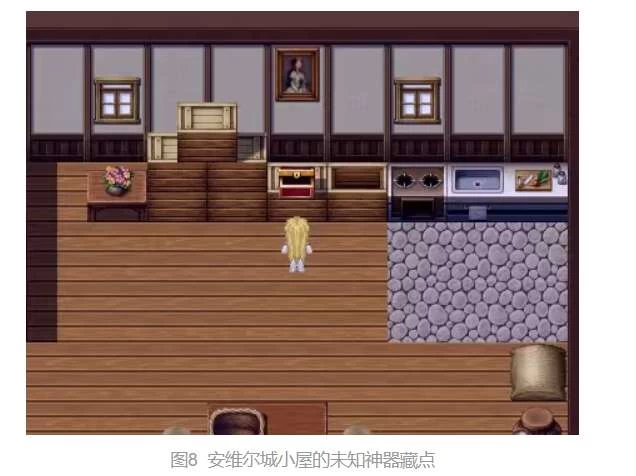
Unknown Artifact Locations
Anvil City Church 2F Priest's room on table at foot of bed. Chest on box under painting in hut next to teleport point. Imperial Ruins jet-black gem room—use Blaze Orb to open passage. Treasure chest in Ferdinand's Domain (entry method unknown).
Beast Nation Route Walkthrough
1. This route is recommended after completing Empire Route. After learning Undead Transformation from Torres City, return to Empire and wait one day. Use Succubus Transformation to fly into third princess Shanga's room balcony near Plaza District castle area. Talk to collect Shanga's Memory, then tell truth.
2. Night 2: Return to balcony to collect Shanga's Bedroom Memory 1. Night 3: Talk to Jenny and choose "Accompany Shanga", enter secret room, investigate left mirror to collect Slute's Secret Room Memory 1 and Shanga's Bedroom Memory 2.
3. Night 4: Castle 2F secret room entrance → secret room, investigate left mirror to collect Memory 2, investigate right mirror and book, return to room to sleep and trigger scene. Night 5: Investigate right mirror in secret room to collect Memory 3, return to room and tell Jenny about travel plans.
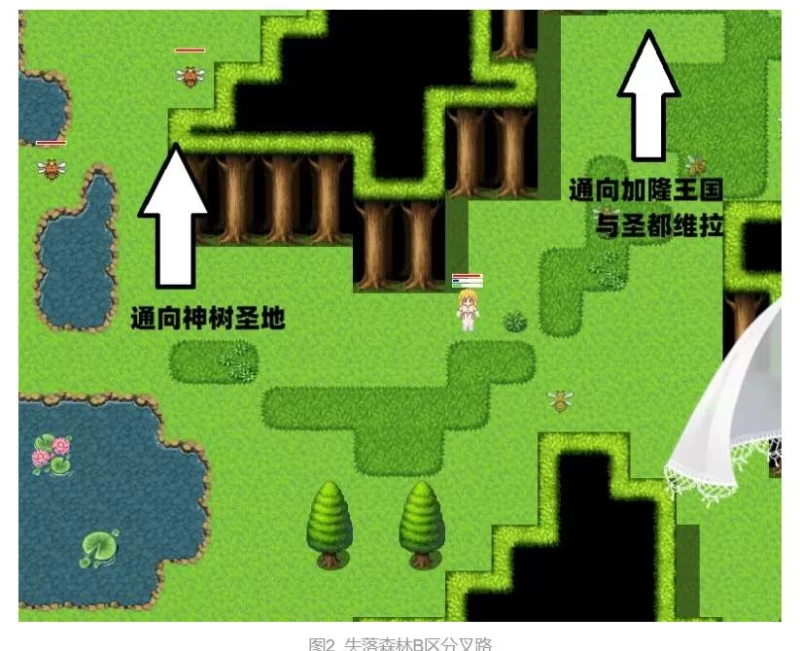
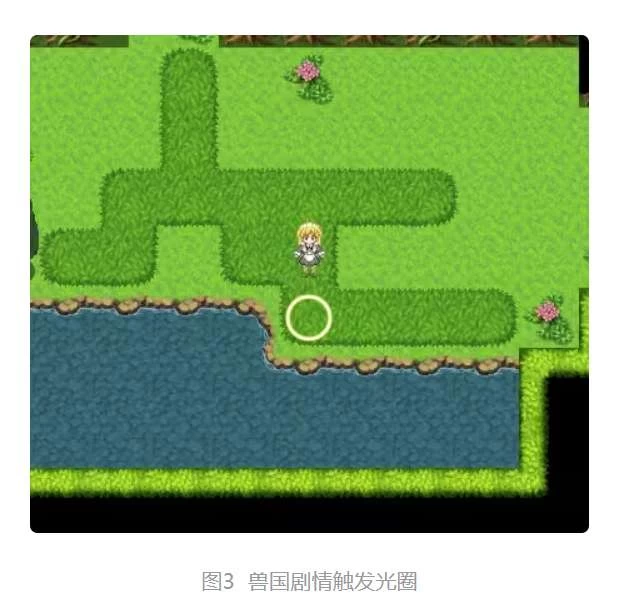
4. Daytime: Depart from Imperial Port, buy 500G ticket to Holy Capital Vira. Leave port, go to nearby forest entrance, walk to end and return—light circle appears by water, approach to trigger scene. Follow Chain Beast guidance to Beast Nation entrance and wait to enter.
5. Mini-game tip: Opponent starts low speed, becomes medium after one action, then high. Use matching speed each turn. Change focus: low speed = scattered, medium/high = concentrated. Use stamina to break free and reduce Faith. Beastification 100 triggers scene, collecting Ritual Memory and Beast Girl Memory 1, obtaining Identity: Beast Girl.
6. Daytime: Talk to Andy to feed and collect Beast Girl Memory 2. Travel together to top-right for competition to collect Memory 3. Night: Trigger scene at left bed outside room, return to room to sleep. Can go with Andy to green teleport room to get Artifact - Domination.
7. Day 2 day: Competition collects Beast Girl Memory 4. Night: Find Lina on left to start Divine Beast scene. Discovered in temple passage collects Divine Beast Memory 1. Walk to northernmost temple, talk to Elena and return to sleep. Choose "Devour Chain Beast" to quickly train Beast Human Form Transformation level but lose Faith.
8. Don't find Andy or Divine Beast for 3 consecutive days—sleep at night and choose "Don't Skip" to collect Beast Girl Memory 5. Continue training—winning competitions after Divine Beast feeding. First playthrough: Night, top iron栅栏 (bar/grate?) in room choose "Go Alone" to collect Baroque Memories 1-2. Choosing "Wait for Chance" or "Transform and Lose" both trigger minor branch ending with Memory 3, give failure memories to restart.
9. Choose "Try Transforming"—Faith below 90 triggers human form battle, victory lets you leave Beast Nation. Choose "Pray for Salvation" to leave directly. After competition victory, ask Andy about Beast Mother during day—learn conditions through competition. Feed during day, Divine Beast feeds at night to raise Faith (needs Faith 60+ to win). Divine Beast feeding +5, competition +2, sleep +2, Andy feeding +1, devouring Chain Beast -10.
10. After winning competition with Faith 100, find Lekem in top room during day with Andy to accept ritual and become Beast Mother, obtaining Identity: Beast Mother.
Holy Capital Vira Route Walkthrough
1. This route is recommended after completing Beast Nation Route to obtain Artifact - Domination. Prepare at least 18 Small Soul Crystals or 4 Medium. Author has modified this route, subsequent changes may cause guide gaps.
2. Holy Relic Route: After seeking Water God Crystal in Lost Forest and losing to Snake Woman, choose "Ask Slime for Help" to unlock Slime Route. After escaping, choose "Go to Vira" directly; choose "Return to Anvil City" and you'll need to go to Vira later, return to Empire at night, trigger Living XX at Noble District top-right.
3. Arrive at Vira, open teleport point. Church 1F left library door, talk to Bachna to inquire and advance, obtaining Identity: Novice Nun. After becoming nun, sleep to advance and collect Spirit Girl Memory 1. Daytime sleep advances to collect Charlize Memory 1. Daytime sleep until confessional, find Bachna to learn workflow and collect Spirit Girl Memory 2. Daytime sleep to officially become Spirit Girl, collecting Charlize Memory 2.
4. Afterwards, talk to Bachna in library to learn you need Beast Nation Artifact. After obtaining it, talk to get Identity: Slime. After waking, go to Believer's House above orphanage, talk to landlady, go to 2F to find Bachna and start hunt, collecting Black Magic Memory 1</


Publish Comments